


The goal of this tutorial is get this splice. The method we will show you is one of the easiest ways to splice Polyester Braid on Braid. The advantage of this splice is that it only reduces the breaking load by approximately 10%, whereas a bowline can reduces the breaking load by up to 40%! Be careful because this method should not be used on dyneema.
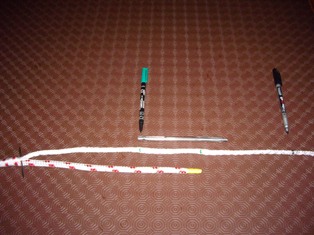
You’ll need a rope, 3 colored pen, a sharp knife, tape, selma fid.
Let’s start:
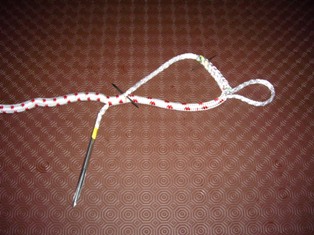
Tie a loop in the rope approx. two meters away from the end. Choose a Selma fid with a diameter approx. a half or two thirds the diameter of the rope. Mark the rope one fid length from the end with first colored pen.
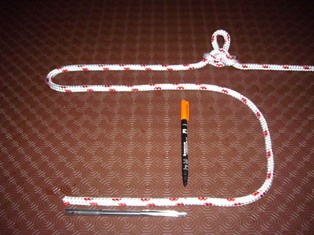
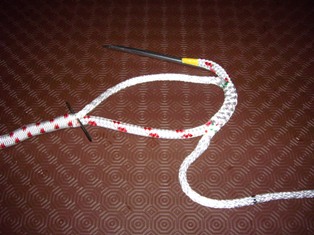
Make a loop to the size of eye you require, and mark again with the same colored pen. Cut the heat sealed end off with the shape knife, and wrap a piece of electrical tape around the end (not shown in this picture). At second mark, pick the cover aside using the smallest Selma fid, and extract the core at this point.
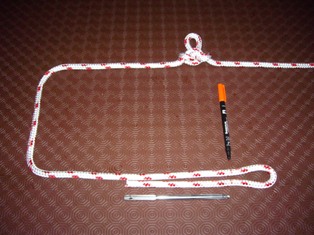
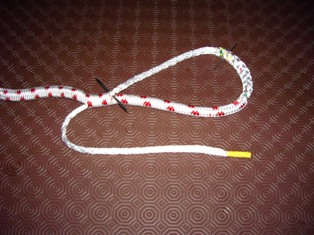
Wrap electrical tape around the end of the core to stop it un-ravelling. Milk the cover from the knot to the end, so that both core and cover are the same length. Then where the core exits the cover, mark this point with the second colored pen.

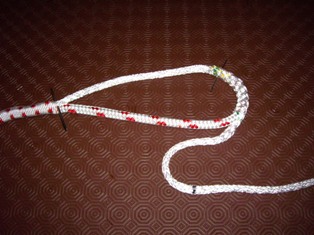
Pull out some more core, and with the third and final color pen mark the core one fid’s length from the mark you’ve just made with the second color pen.
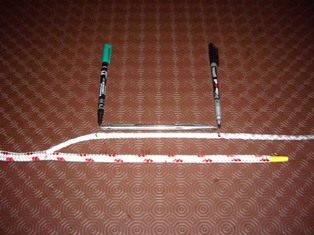
Pull out even more core, and again with the third colored pen mark the core 2/3 of a fid’s length from the mark you’ve just made with the same pen.
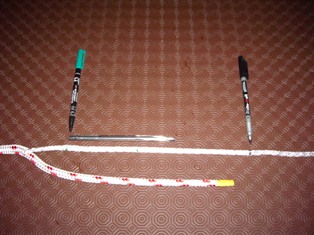
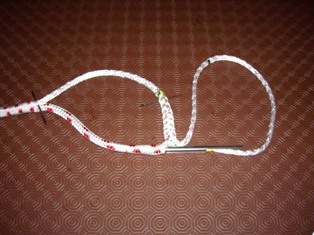
Pull out even more core about another foot if you can, and insert the first of your sailmaker’s needles through the core to stop it creeping back into the cover.
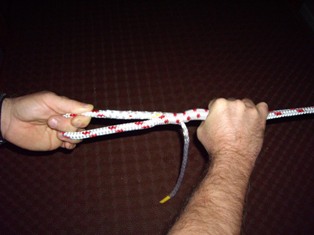
Place the end of the cover into the selected Selma fid and insert into the core at the second mark you made on the core and out at the third mark you made on the core (both with the last pen).
Remove Selma fid. Gently work the cover slowly back into the core and secure with the second sailmaker’s needle so as not to pull the cover back out again by accident.
Place the core into the Selma fid and insert the fid into the cover very close to where the cover entered the core. Make sure there is no slack in the core between the 2nd sailmaker’s needle and the point where you are just about to insert the Selma fid.
Feed the Selma fid down inside the cover and out about an inch past the point where the first sailmaker’s needle is positioned. In this 1 inch length be careful not to accidentally catch the core with the Selma fid. To check this just pull the core slightly. If it moves it’s not caught. If it doesn’t move ease the Selma fid back a little and try again. Pull the Selma fid right out of the cover at this point bringing the core with it.
Remove the Selma fid and gently pull the remaining core through the cover until everything is tight at the ‘crossover’. Then remove both sailmaker’s needles.
Place the loop that you tied at the beginning over or around some strong point. Place your finger or fingers in the eye and pull towards you, and at the same time milk the slack in the cover towards the eye. The splice will disappear into the cover. If you are going to insert a thimble into the eye then do it just before you finally bed the eye in.
Cut off the exposed core and stretch the eye until the core goes under the cover.
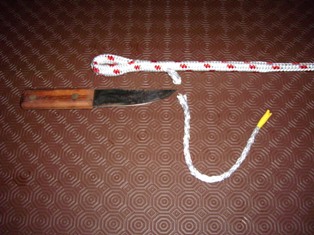
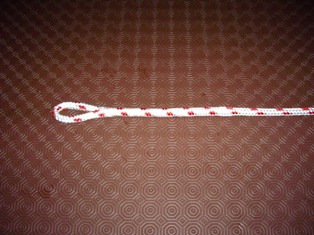
If your final splice looks like this, then good job !
Go get your Selma fid now on the Balance Community website :
http://www.balancecommunity.com/selma-fid
